 |
Date Announced: 04 Jan 2011
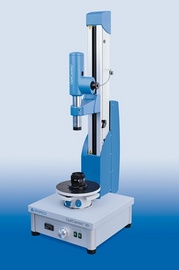
Measuring lens centering, air spacing, and center thickness inside of assembled optical systems with a single instrument.
The new OptiCentric® 3D provides an ideal solution for the complete opto-mechanical characterization of assembled optical systems. This new approach integrates different lens analysis technologies and provides a valuable tool for the evaluation of complex optical systems in R&D or routine quality inspection in production.
The two-in-one solution for the detailed investigation of assembled objective lenses combines the proven OptiCentric® centering error measurement technology with a low coherence interferometer called OptiSurf®, measuring the air gaps between lens surfaces and the centre thickness of lenses within the optical system. The cross-interaction of both measurement systems allows the fast alignment of the lens system, and provides a significant increase of the overall measurement accuracy and detailed manufacturing quality information:
• centering errors of less 0.1 μm
• air spacing and centre thickness of less 1μm
The software has a two level user interface for complex analysis routines in R&D phase and an intuitive and user-friendly display for operators in the production environment.
Source: Trioptics
E-mail: s.mohr@trioptics.com
Web Site: www.trioptics.com
| © 2026 SPIE Europe |
|