 |
Date Announced: 09 Mar 2015
We Know the Surface Accuracy of a Substrate
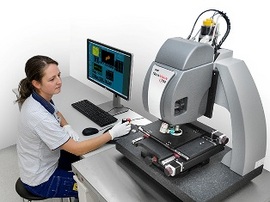
Substrates with a good surface quality are required to produce high quality laser optics. The surface roughness for laser optics should, therefore, be inspected.
These measurements are performed at LASER COMPONENTS with a white light interferometer. White light interferometry is a non-contact optical measurement method which uses the interference of broadband light to measure the three-dimensional structure of a surface. The measurement accuracy is
All of the lenses produced in house, as well as substrates produced externally, can be tested using this new technology. This extra quality control means that our customers can be sure that they always receive high quality optics.
The surface roughness can be documented as necessary for applications that require “super-polished” optics.
We randomly select substrates for routine measurements; in special applications they are always performed and can be documented for customers on request.
By measuring the micro-roughness of the substrate’s surfaces, we are able to ensure that the quality of the optics used by us is consistently high.
For more information visit our website at: www.lasercomponents.co.uk
Trade Show
The Company
The Company formed in 1986 and is located at six locations in Germany, France, UK, Canada and USA. Extensive in-house production accounts for approximately half its turnover. Currently, the family-run business employs more than 120 people worldwide.
LASER COMPONENTS (UK) Ltd Goldlay House 114 Parkway, Chelmsford Essex CM2 7PR |
Tel: 01245 491499 Fax: 01245 491801 |
E-mail: www.lasercomponents.co.uk
Web Site: info@lasercomponents.co.uk
| © 2026 SPIE Europe |
|